
Space is a premium and highly prized in an apartment and on a balcony. Sometimes there isn't enough space to grow a decent amount of food, and that's where growing microgreens can be a great option to grow fresh greens. It can also be hard to grow food during the colder months or if you don't get enough sunlight and the good thing about microgreens is that you can grow them year-round.
Why microgreens?
Nutrition
Microgreens are very easy to grow all year round and require little effort. Seeds contains all that is needed to produce another plant and so has a large amount of nutrition for such a tiny size. For example, in this study, the 25 microgreens they tested had between 20.4 to 147.0 mg of vitamin C, in some cases more than double the fully grown plant we eat.
Flavour
Microgreens are packed full or flavour. You can add them to just about any meal to add flavour and colour.
Cost
I can buy a 500gm/1lbs bag of seeds for $2.70 whereas the microgreens at my local supermarket costs $2.15 for 150grams.
Fun
It is so fun to watch the seeds germinate, grow, harvest them and eat them. You get the complete cycle of seeing where your food comes from in as little as 10 days. It is also something you can do with kids.
What is the difference between microgreens and sprouts?
Microgreens
Microgreens are grown to the point either just before their first set of true leaves come through or just after. Only the leaf and stem are eaten and is grown either in soil or on a tray where the roots make their way into the water below. You can set and forget, the only thing you need to do is take off the lid once the seeds germinate and fill the water up again if you leave it for 2+ weeks. According to this article, the risk is reduced for harmful bacteria so long as you buy seeds fit for human consumption, more about that below.
Sprouts
Sprouts are grown usually in a sprouting jar and eaten whole. They require being washed with water at least once a day. Think of the bean sprouts that some with Asian food. this is the traditional method. I do not make sprouts as they require constant attention and carry a risk of E.coli, Listeria, and Salmonella and it is recommended that you cook them thoroughly to avoid that risk, which in my view, removed the point of eating something fresh. Read more here or search your local food safety authority's website.
How to grow microgreens
I use both options below, the water trays are grown inside and soil option I grow outside but that doesn't matter, just a personal choice.
Water tray option

To grow microgreens in this option, you will need a tray and another tray at the top with holes in it like the one on the right. I got it my Mr Fothergill's (available in AUS and NZ), I am sure you can get something similar from a local store if you are not down under.
You can also make your own. You need something that will prevent the tiny seeds from falling through. I've seen people online use a tray with stockings/tights over the top, fly screen material, cheese cloth/muslin or stainless steel mesh. Other than the cheese cloth and stainless steel mesh, I don't know about whether they are food safe or not, so I gave up using them.

With the tray option, I just use unscented toilet paper. The good thing about toilet paper is that it is readily available, the roots of the germinating seeds have no problem growing through it, it is an organic material and there is no mess or hassle of cleaning the material to re-use it. For one tray, all I need is four sheets of toilet paper and once i have harvested the microgreens, the roots and toilet paper go into my worm farms.
Here is a step my step guide
clean the trays
place in a position that gets sun like a windowsill, don't worry if you cannot put in a place with sun as they will still grow, just a bit slower
put the top layer tray into the bottom tray
put toilet paper sheets onto the top tray, it is okay if they overlay a bit
pour water over the toilet paper and fill until the water level is only just above the toilet paper, do not over fill beyond this otherwise the seeds with float around and the toilet paper will also float
sprinkle seeds over toilet paper
cover for one week, I use aluminium foil I re-purposed
in about 10 days, you can harvest, I let mine grow for about 2 weeks
Below is the tray with Cress seeds which germinated only 4 hours after placing them onto the tray.

Soil option
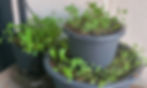
With this option, all you need to do is sprinkle the seeds onto the surface of the soil and the cover with a tiny bit of soil and then just harvest them from day 10 onwards. Sometimes I just sprinkle on the top. Make sure to wash them to remove and soil. Don't worry about the soil being depleted as you are only getting the seeds to germinate rather than growing into a full-grown plant. I use old pots and take away constrainers and foil food trays as they have a large surface area. Use whatever you can get your hands on.
Where to get seeds to grow into microgreens
You can source microgreen seeds from a few places. The only thing you have to be careful with packet seeds. A lot of commercial seeds are treated with fungicides etc. that is not safe to eat; this will often be on the packet. Your best bet is to buy seeds specifically for microgreens/sprouting from a garden store or seeds designed for human consumption.
The most economical option is buying seeds from the supermarket as you get heaps of seeds really cheap. I buy my microgreens seeds from my local Indian grocer as I can get 500gms/1lbs for $4 and there is a huge variety to buy, things like mustard (my personal favourite microgreen!), fennel, fenugreek, poppy, cumin, coriander, the list goes on!
What microgreens you can grow

You would be amazed with what you can grow into microgreens and eat! Many of them are already in your pantry like Mustard and Sesame seeds! My favourite microgreens to grow are Chia, Flaxseed and Mustard because I can buy them in bulk for such a cheap price, I can use them in other recipes and a 1 250gm/0.5lbs bag is more than 2 years supply of microgreens. I also buy Cress seeds from my garden centre because I love the taste.
Here is a non-exhaustive list of microgreens you can grow and where to source them.
Alfalfa – source from gardening centre
Amaranth – source from gardening centre
Barley – source from health food store
Basil – source from gardening centre
Bean varieties - best grown in soil – source from supermarket or health food store
Beetroot – source from gardening centre
Broccoli – source from gardening centre
Brussel Sprout – source from gardening centre
Buckwheat - best grown in soil option, source from health food store
Cabbage – source from gardening centre
Carrot – source from gardening centre
Cauliflower – source from gardening centre
Celery – source from gardening centre, seems like Celery seeds are more common in supermarkets in North America
Chia seeds - easy to source from supermarket or health food store
Chard – source from gardening centre
Chickpea - best grown in soil option, source from supermarket or health food store
Chives – source from gardening centre
Collards – source from gardening centre
Coriander/cilantro seed – get in bulk from Indian grocer
Cress (one of my favourites! a little bit spicy!) – source from gardening centre
Cumin seeds – get in bulk from Indian grocer
Dill - get in bulk from Indian grocer
Fennel - get in bulk from Indian grocer
Fenugreek - get in bulk from Indian grocer
Flaxseed - get in bulk from supermarket or health food store
Hemp - best grown in soil option, get in bulk from supermarket or health food store
Kale – source from gardening centre
Leeks – source from gardening centre
Lentil - must not be split, best grown in soil option
Millet - get in bulk health food store
Mint – source from gardening centre
Mizuna – source from gardening centre
Mustard – get in bulk from Indian grocer or supermarket
Onion – source from gardening centre
Parsley – source from gardening centre
Peas, such as snow pea etc. – best grown in soil option
Poppy – source from supermarket or Indian grocer
Pumpkin - grow from seeds from pumpkins you eat. Best grown in soil option
Quinoa – source from supermarket or health food store
Radish – source from gardening centre
Rocket/Arugula – source from gardening centre
Sage – source from gardening centre
Sesame – Easy to source from supermarket
Sorrel – source from gardening centre
Spinach – source from gardening centre
Sunflower (must be unsalted and have shell on to germinate)
Tarragon - great if you can get your hands on these seeds, I love the taste – source from gardening centre
Thyme – source from gardening centre
Wasabi - – source from gardening centre
Water Cress (also spicy!) – source from gardening centre
Wheatgrass – source from gardening centre
Microgreens you can't eat
Plants from the Nightshade family such as tomato, eggplant, capsicum/peppers and potatoes (sweet potato is okay) should not be consumed as microgreens as they are poisonous.
What to do with your microgreens
The only limit for use is your imagination! Here are some uses.
Garnish and flavour food - sprinkle on top of food to add flavour. e.g add over the top of eggs, add to the top of soups when serving pizza or pasta before serving.

Garnish and flavour drinks - microgreens like mint add a lovely extra flavour to drinks
In sandwiches or wraps
In smoothies or juices
Stir fries - this works best with the larger ones
Mixed into salads - this is how I tend to mostly eat them.
Conclusion
Microgreens are easy and cheap to grow, they can be grown all year round, they are packed full of nutrition and flavour. You can grow them in trays or pots you already have lying around. Microgreens are especially good to grow during the cold months and when you have limited space or don't get much sunlight.
Let me know how you go growing microgreens or if you have any questions.
Shout me a packet of seeds
If you liked this blog article and have some spare coins to share in line with the permaculture principle of Fair Share/Redistribute Surplus, please shout me a packet of seeds or some garden supplies.
This will also help me to buy garden supplies and cover the costs to host the site, currently costing me hundreds of dollars per year form my own pocket.
With much gratitude.